Chemistry is the one with the shapes. That one that everyone seems to hate in high school. I’m not sure why people claim to dislike it though. In chemistry, you get to bend nature to your will, designing new substances, materials and applying physics in a practical sense. It’s pretty cool that I’m starting to get close to the point in which I actually get to be a real scientist, doing research! It’s amazing how far I’ve come since I was a kid. As part of this journey, I recently had the opportunity to work with a real scientist on his research project.
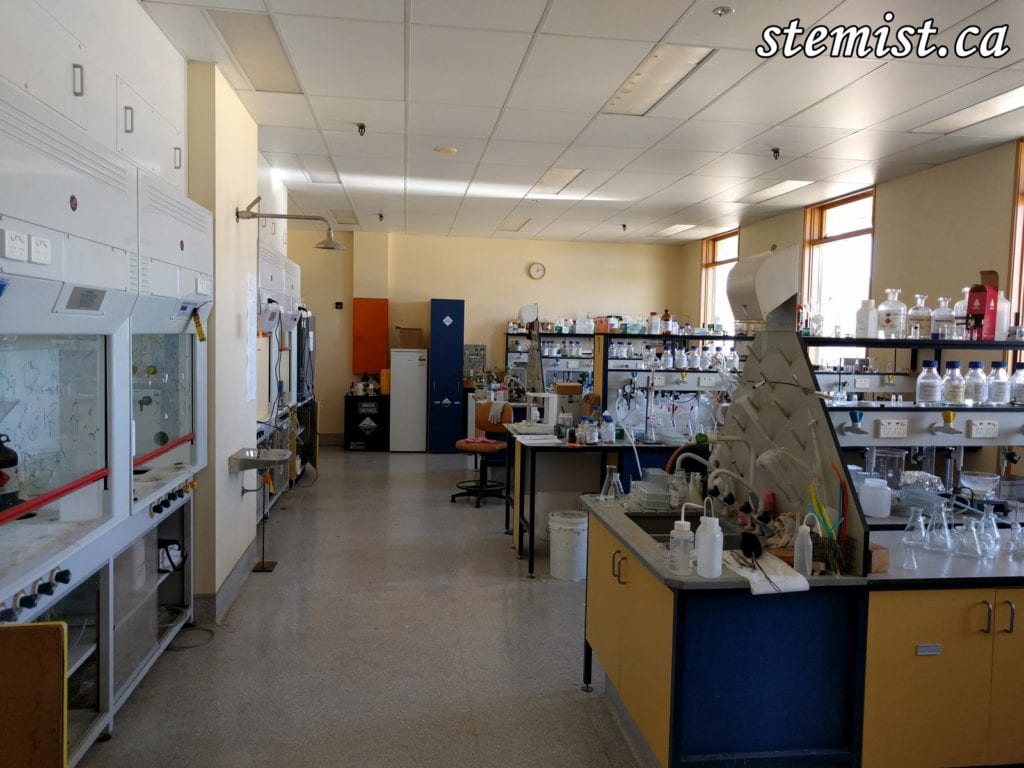
1. The research lab in which we work.
As an undergraduate, it is very important to try and get research experience. Graduates who have such experience generally have an advantage when it comes to looking for work. In the last two weeks, I have been very fortunate to come under the mentoring of Dean, a PhD student in Chemistry. He noticed that I was trying to determine the city water’s lead concentration by myself in a lab one day, and invited me to help him with his research. Now I am lucky enough to have one on one experience with him, which I will document as part of this website.
He is trying to develop more effective ways to visualize inflammation within the human body. Right now, methods to do this are specific to different types of inflammation. Ideally, the end result might be a solution you can inject into a patient that will image a greater range of inflammation sources than we currently have.
Currently, we attach one or more carrier molecules (ligand complexes) to a radioactive metal isotope and inject the ligand-metal complexes into the body, where they interact with and accumulate at sites of inflammation. The isotope emits positrons, which annihilate with electrons within the body, producing gamma rays which we can detect with a gamma camera. This forms an image of the inflammation site.
This research will be important in improving the amount of inflammation that can be visualized. The part where I come in is to help synthesize the ligands so we can test them. Where will this be done? In a STEMIST laboratory of course.
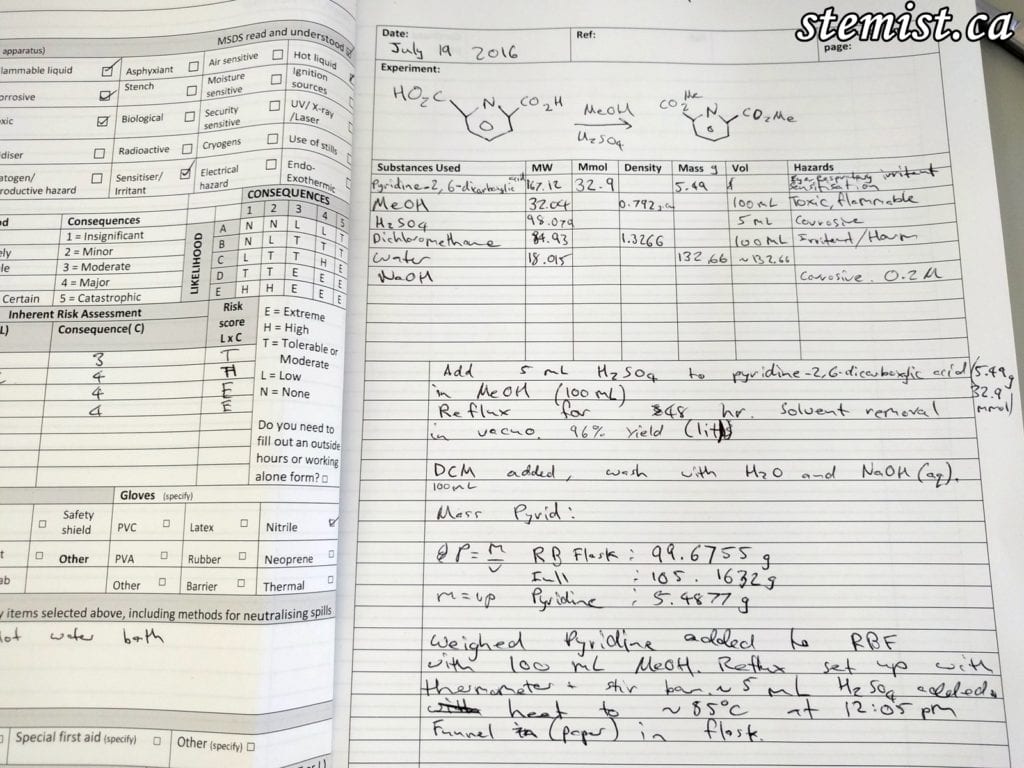
2. My notebook, detailing the reagents (chemicals) involved, the conditions, risk assessment and the procedure to follow.
Organic chemistry is basically molecular architecture. Once you have reached the point where you understand that all normal matter is made of atoms, you can rearrange them to make new substances. How do we do this? We take collections of atoms, either elemental substances (just one type of atom) or compounds (mixtures of atoms bound together in specific ways) and rearrange their structures. We can add them together, separate them, and exchange pieces of these compounds around to make new ones, and hence, new substances. In practice, this usually means mixing compounds and elements in specific proportions, and subjecting them to heating, cooling, stirring, pressure or electricity. Chemists, really, are engineers of matter itself.
When I got to the lab, we first had to develop a plan for what we should work on. We decided to start at the beginning and build a target ligand using starting materials. The whole synthesis will probably take a few weeks, so this post is detailing the first step of the process.
We searched up an example of the reaction we wanted to do on SciFinder, and looked over the procedure. I wrote the basic outline of the given procedure in my notebook to use as a reference. The starting material for this reaction is pyridine-2,6-dicarboxylic acid, a molecule that has a number of hazards associated with it. So, as per protocol in chemistry, a risk assessment must be completed.
I like to joke that chemistry is one of the few majors that can kill you. After all, to my knowledge, no one has ever died due to math overdose! However, all experiments are quite safe as long as the risks associated are managed with correct containment, personal protective equipment (PPE) and training.
After the risk assessment and plan were completed, I started the experiment. The first thing to do was to weigh out the required mass in grams of pyridine-2,6-dicarboxylic acid. Dean showed me a useful trick in using paper to create a small funnel to protect the rim of the round bottom flask. You want minimize any losses of mass, and also prevent potentially corrosive substances from connecting to other flasks at their joints. We joked that things like this are never mentioned in lab manuals in undergraduate classes, and are things you pick up with experience. It’s great to be working with an experienced chemist!
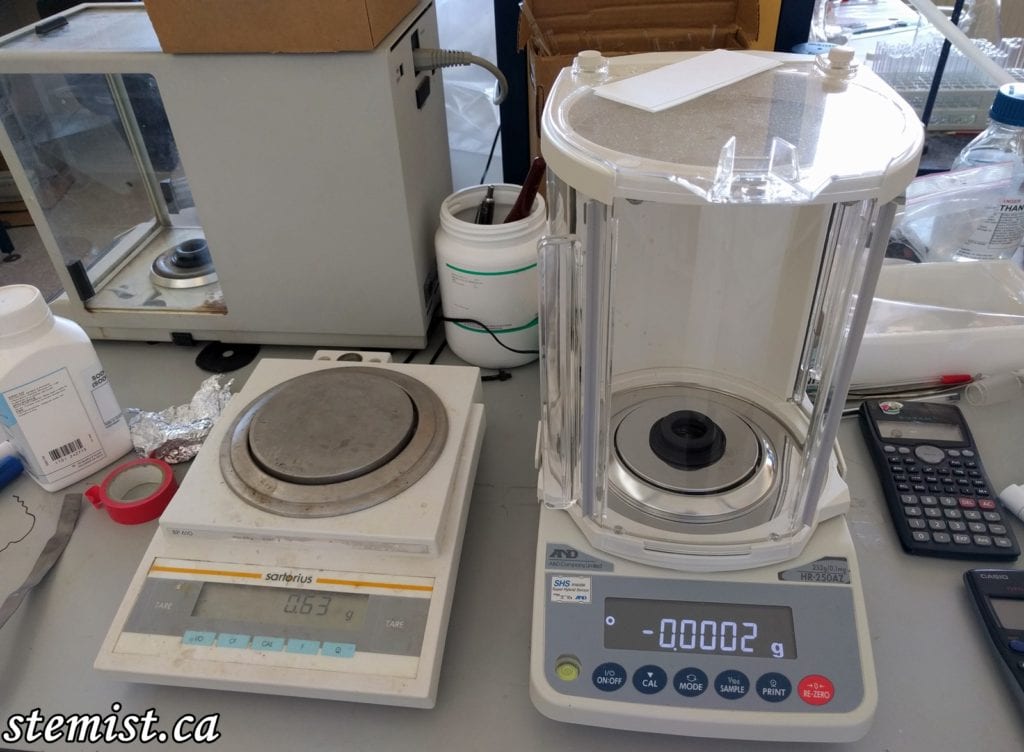
3. On the left, a top-pan balance for general weighing. On the right, a more accurate analytical balance used for weighing masses down to approximately a ten thousandth of a gram.
With the weighing completed, the starting material was poured into a 250 mL round bottom flask and taken to a fume hood. The fume hood directs airflow into itself and acts as blast shield and spill container to protect the worker — in this case, mainly me. I suspended the flask above a hotplate and oil bath for heating. Following this, I added methanol (MeOH, 100 mL) and H2SO4 (5 mL) to the flask, as well as a stir bar. Then a condenser (a tube with water flowing through it to cool reaction gasses, turning them to liquid again and returning them to the solution) was placed on top. This reaction contraption was to complete my reaction over 2 days by itself, once the heating and stirring was turned on and stabilized.
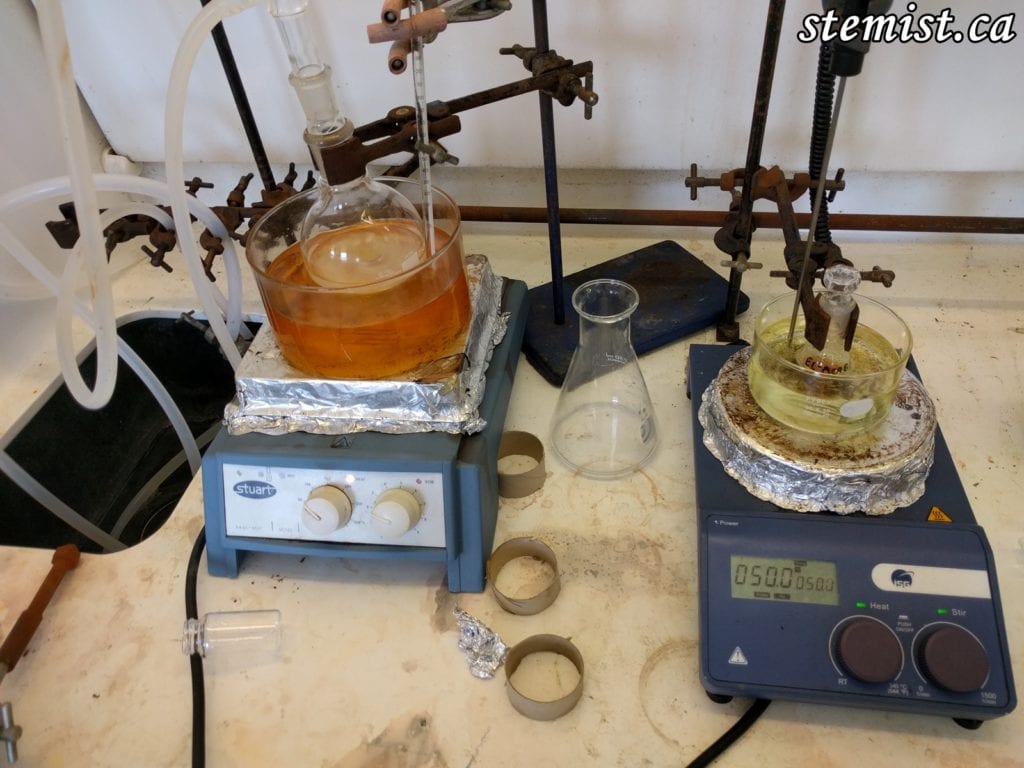
4. My reaction is on the left, Dean’s is on the right. Thermometers help monitor the actual temperature of the reaction.
With the reaction heated to 80 degrees Celsius (353.15 K), the molecules in the flask would have enough kinetic energy to smash together, exchanging electrons, breaking and forming new bonds. The reaction was then left for 45 hours. Following this, the heat was turned off. Once the flask had cooled to more or less room temperature, the solvent was evaporated off using a rotary evaporator. This machine creates a low pressure atmosphere, also heating and rotating the mixture. The lower the pressure, the less temperature is required to boil substance a substance (boiling is when a substance’s vapor pressure equals atmospheric pressure). As organic solvents have a low boiling point, this is achieved at the low temperatures of a warm water bath.
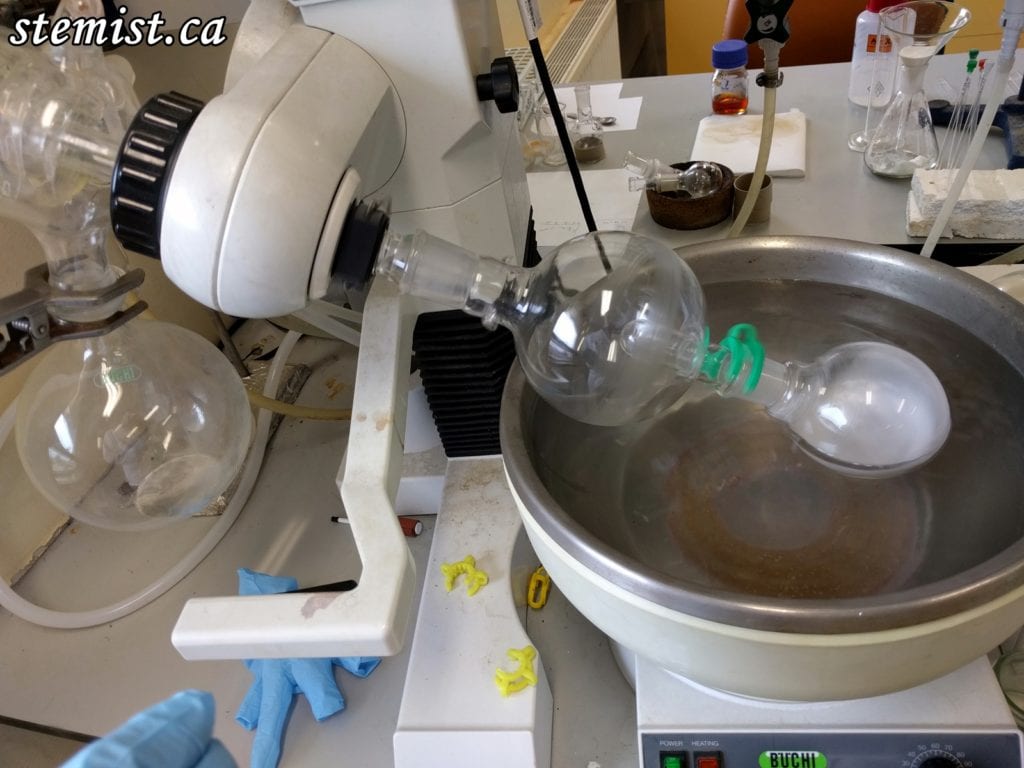
5. The rotary evaporator in the lab. The green clip secured my reaction flask containing product (on the right) to the rotating chamber. Solvent is condensed and collects in the flask on the left.
With the solvent gone, we have a mixture that contains mostly product (what we are trying to synthesize during the reaction), but also a number of unreacted starting reagents. To remove these, we need to do what chemists call an extraction. I took the flask to my bench and set up the required apparatus.
Basically, we can exploit the Earth’s gravitational field to assist with separating mixtures. By adding another solvent, dichloromethane (DCM), we dissolve our organic product, making a solution of DCM and organics. There are also water soluble contaminants that we don’t want, so we can add water to dissolve those. DCM, containing our product, is denser than water, so gravity makes it sink to the bottom. Therefore, the water layer sits on top. To make sure the product is as much in the DCM layer as we can make it be, we shake the flask, making sure to vent out the pressure buildup. Dean taught me a good method of doing this. He analogized that you must “shake it like a baby”. You want it to mix as much as possible, but you don’t want an emulsion to form, so you have to also be slightly gentle. One on one instruction like this is definitely superior to group lab sessions.
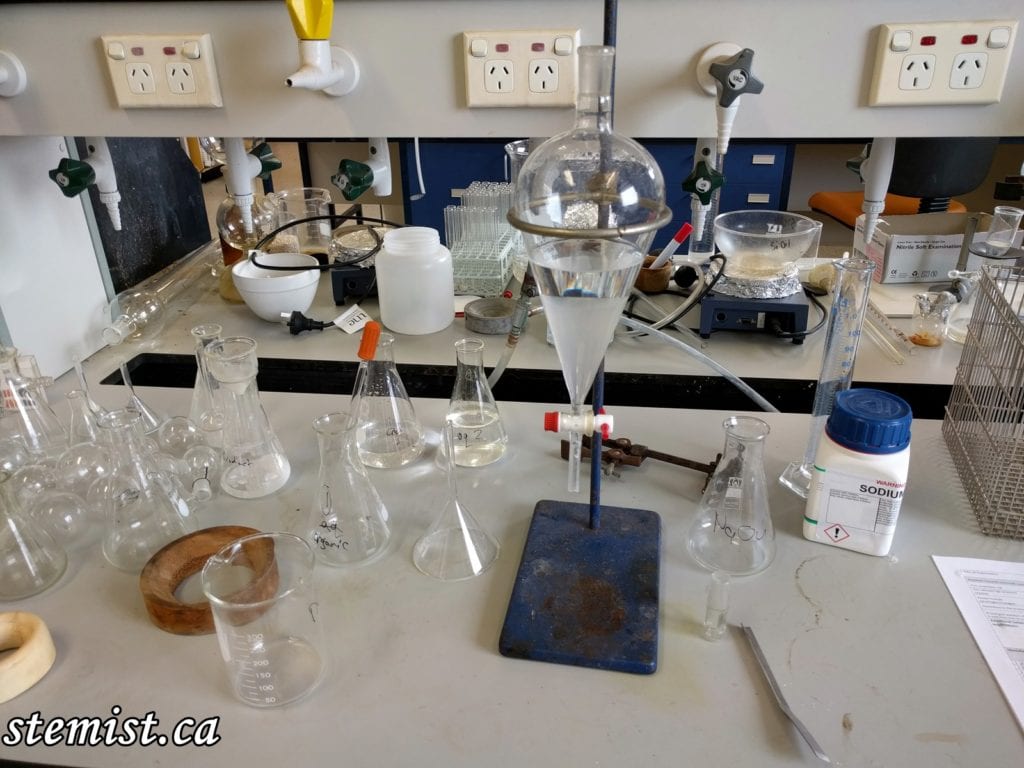
6. Separatory funnel containing the opaque DCM layer with the product on the bottom, and the clear water layer on the top.
The DCM layer was removed into a conical flask. The remaining water layer still might have some product and DCM in it, so the extraction with water was repeated 2 more times. NaOH, a base, was also added to neutralize any remaining acid from the beginning of the reaction.
We’ve almost got a pure product! After the extractions were completed, the DCM layers (separate washings) need to be “dried” with solid sodium sulphate (Na2SO4). The Na2SO4 is physically added to the solution to absorb any water present into itself. This solid is hydroscopic, meaning that water is attracted to it. Once the solid is filtered out through a filter paper + funnel combination, we should have a largely pure product contained within water-free DCM. Now we just put each flask back on the rotary evaporator (also known as “rotor vapping” it) to remove the DCM, leaving us with pure product!
Now, how do we know the mass of the product alone, without the flask, if the flask must be weighed as well? Well, at the start of the experiment the clean round bottom flask was weighed, so we just subtract its weight from our totals. The masses of the products collected in each washing were added together, giving a final mass of product of 6.0265 g. This is a yield of 94.05% of what we expected to get given the mass we started with! The SciFinder literature says their yield was 96%. So I did excellent!
Now what must be done is characterize the product. We can use different analytical techniques to confirm that we indeed have the product we wanted. I’ve definitely learned more small tricks in the last week than I would in any typical lab practical in class. I’ll be going back into the lab tomorrow to characterize the product, making sure it is indeed what we are after. Stay tuned!
 7. The final product, dimethyl 2,6-pyridi